Hey hey, thanks for stopping by today!
Our custom colour and bespoke printed backdrops have been live for a while now and many of you are enjoying shooting with them (like me!) so we now have a few notes to mention, frequently asked questions if you like!
5 things that should help you pick your colours, work with your custom backdrops and get the most from them in your photography.
1. Choosing and working with your colour
Because printing is done with CMYK inks we need your colour reference as a CMYK number reference. (CMYK refers to the four ink plates used in colour printing: cyan, magenta, yellow, and key (black).)
You can convert RGB (web colours) or Pantone (ink refs) to CMYK numbers but because this is already taking one action or process/edit we recommend checking the CMYK colour next to your original to be sure it is very close and still suitable.
On top of that we have the issue of screen calibration and the fact we are all seeing things on different screens. Not a problem per say as adjusting colours (especially block colours) can be a quick fix with some easy edits, but it is something to consider.
This Google online colour selection tool is helpful as it shows the Hex (web) colour which you can select and then it gives you the RGB and CMYK codes below.
Generally speaking; allow a 5% tolerance on your CMYK ref and expect it be very close in hue but perhaps slightly lighter or darker once printed.
On the images below you can see my original backdrop colour in the top image, and the edited version below where I have made it less green to match the plate. This was done with a quick 'replace colour' edit in Photoshop but you could also do this in Lightroom or Capture One if you prefer by masking the backdrop area and making your adjustments.
If you're confident in your CMYK colour you can add that to the notes at checkout when you order but if you need any help at all just get in touch!
Please note this wasn't the intention for this custom backdrop - it printed the colour I wanted for another shot but I then chose to use it again here and the only plastic plate I could find at the right size was this more blue one so I edited the backdrop to match! A stylists life right?!


Shot with a custom colour backdrop. Direction + styling by Olson, photographer Bernacki.
2. Printed colours have a slight texture
The printing technique uses dots to mix 4 inks (the CYMK colours) that blend and create your desired colour. Up close you will see tiny dots like in an impressionist painting, but from further away the dots merge together to create a smooth overall effect.
Custom printed backdrops will not look as consistent as coloured paper or card which is made with a pre-mixed dye covering the entire surface. However, our custom coloured backdrops are waterproof (if you choose vinyl) and they are bespoke meaning you can get your perfect colour match - so its down to you to decide which is the priority for you! (I have a good selection of both.)
With this in mind, we don't recommend shooting small items like jewellery or paper crafts on custom colour backdrops unless you don't mind this small dotty texture.
On the example below you can see the slight texture on the bottom surface used as the tabletop - I don't mind it in this instance, in fact I think it adds to the image. But if I did want to smooth it out I would just select the background in Lightroom and take the texture all the way down as you can see in the screengrab (you could also play with the Clarity and Sharpness).
You will notice on all of the images that when the flat and gradient colour backdrops are used behind or out of focus they look perfectly smooth.


Another example with a custom blue backdrop shot overhead and focused very close to the backdrop due to the height of the eggs; followed by another overhead on a custom red backdrop where the focus was about two inches from the backdrop allowing it to soften off. Just this small amount of distance is enough to smooth out and blend the dots (depending on your F stop of course.)


Shot with custom colour backdrops. Direction + styling by Olson, photographer Bernacki.
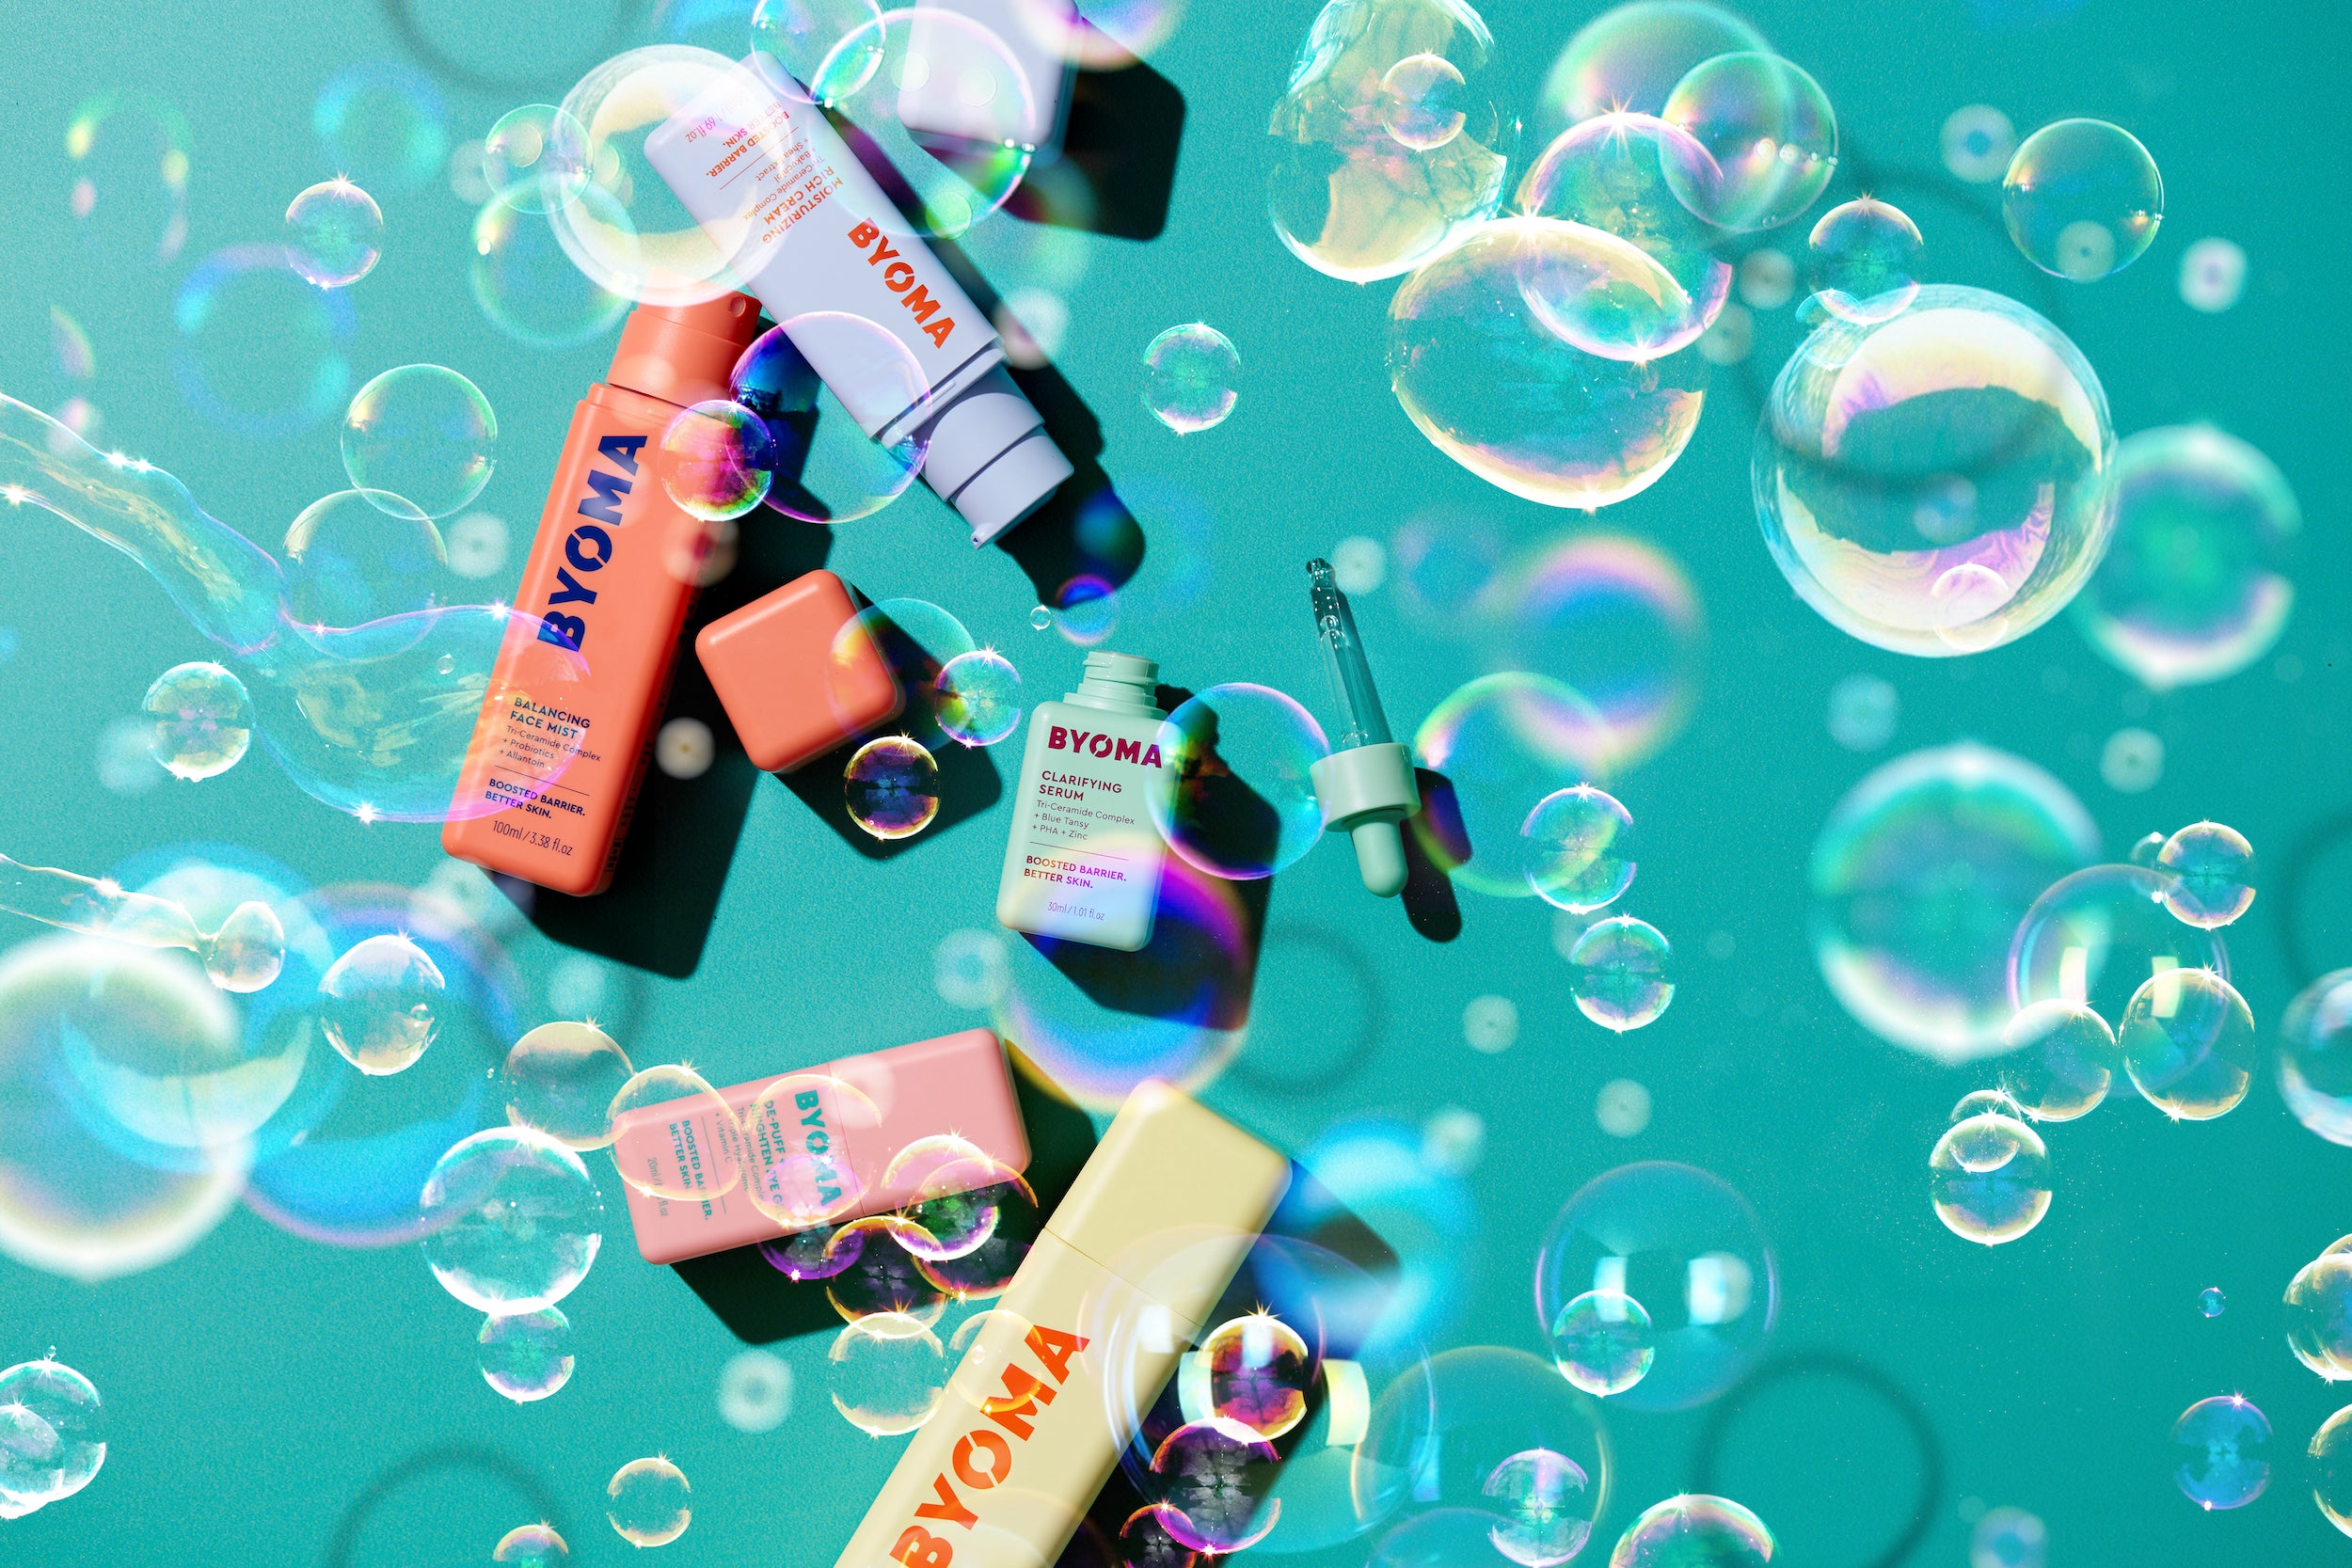
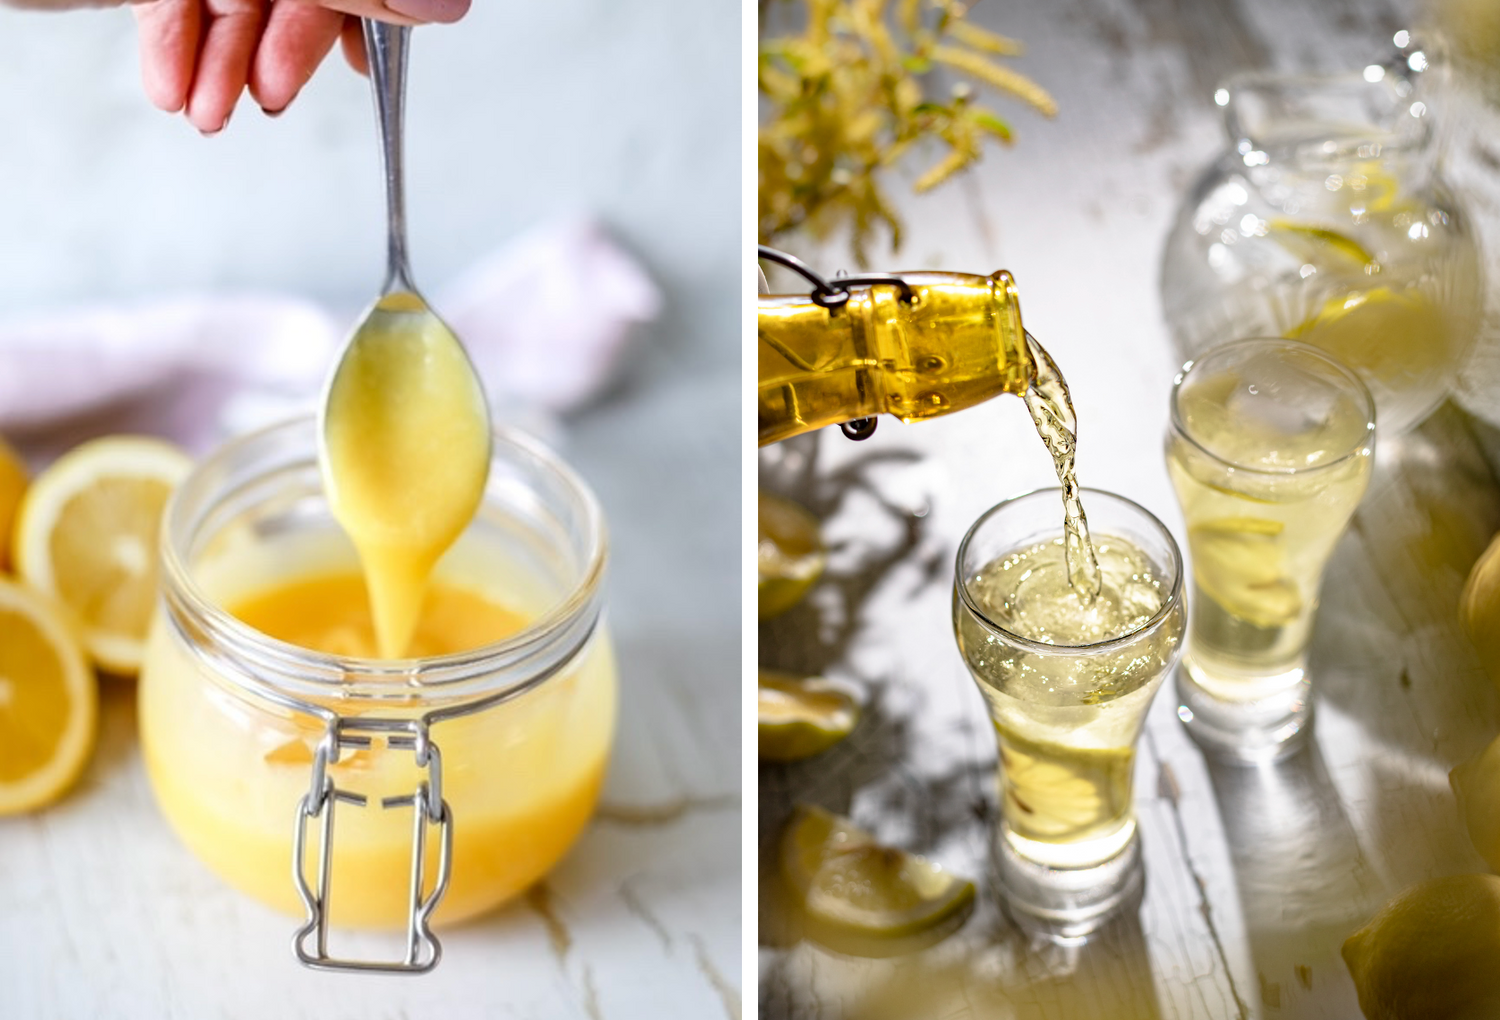
3. Gradient backdrops need to be close colours
Because of the printing process and colour mixing mentioned above, we recommend using similar colours in graduated designs.
Orange to red, yellow to white, turquoise to blue etc will all work really well as a graduated, fading design.
If we try to mix more contrasting colours we run the risk of seeing lines instead of blended, softly changing hues.
I have experimented with this a lot on recent shoots and where the design hasn't printed so well due to the colours being quite different I have been able to edit out the subtle (but annoying!) lines in the same way by reducing the texture and playing with the colours in post-production, but of course this isn't ideal.
We will always let you know if we think a colour combo won't work so well and of course we always send proofs of all custom designs for your approval before going to print.

Shot with a custom gradient colour backdrop. Direction, production + styling by Olson, photographer Rob Smalley.
![]()
Shot with a custom gradient colour backdrop. Styling and photography by Olson.
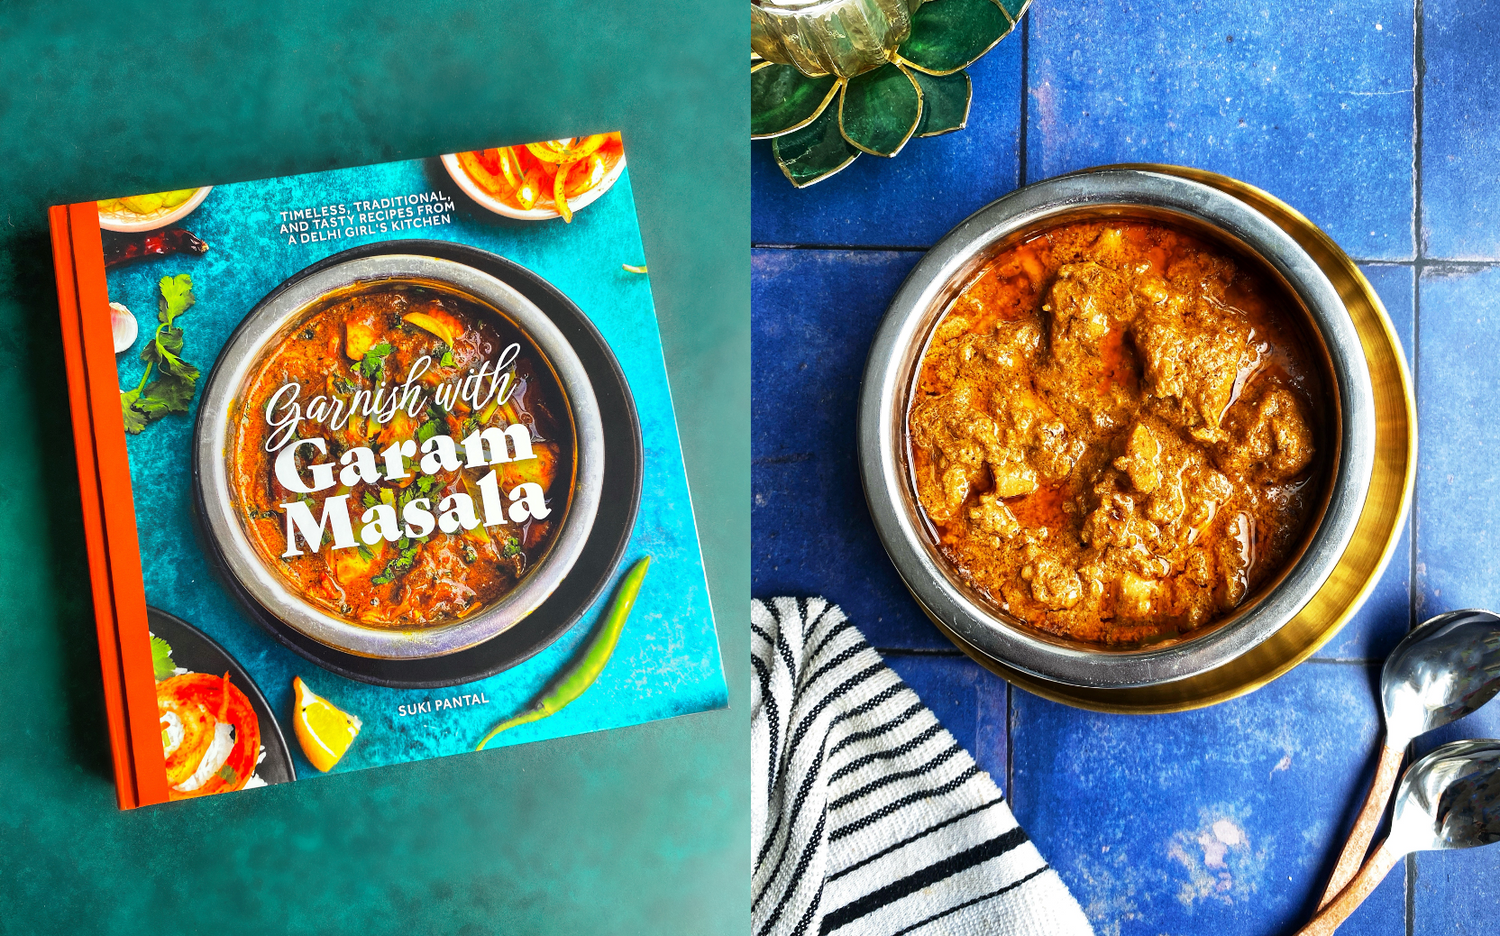
4. Don't be afraid to mix plain colour and textured backdrops!
Working with poppy colours and graphic styling is lots of fun and bang on trend at the mo but don't forget your trusty marble, wood and textured surfaces and backdrops to bring real three-dimensional texture and light and shade.
Unless you're going for a very stylised, editorial or beauty look adding 3D props and surfaces will always make your image feel more dynamic and 'real'.
Mixing smooth and textured surfaces like we do in our homes helps create an authentic lifestyle vibe rather than a classic 'studio' look (you know, where we all know its been shot in a studio and actually you're not even trying to pretend wasn't!)
I love mixing in reclaimed surfaces and furniture with printed backdrops - especially with our new wall 'drop series.

Shot with the ISSY backdrop on the base and a custom colour backdrop behind. Direction + styling by Olson, photographer Bernacki.

Shot with the AMSTERDAM backdrop behind and reclaimed dock wood as the tabletop. Styling and photography by Olson.

Shot with the TEASE curtain backdrop. Direction, production + styling by Olson, photographer Rob Smalley.
5. If in doubt go LARGE!
If -
- you're not sure what size you need
- you're not sure how you'll use your backdrop
- there's any chance you'll need it to go behind your set to photograph anything bigger than a plate of food (bottles, cakes with candles, flowers etc).......
go for the large A0 size!
That way you have the flexibility but can always cut it down if preferred and then would have two identical smaller backdrops.
All of our vinyl and custom backdrops are available to order in three sizes straight on the product pages and you can order any larger paper designs here.
Our backdrops are stocked in the standard A1 size for same day dispatch Mon-Thurs (unless its a custom backdrop or noted as 'on backorder') and the two larger sizes A0 and XL are printed to order - check out the designs you need for the current lead times.
I hope that's been helpful for you! Over time this may turn into '10 things you need to know...' but for now I hope that's covered a few key points.
I'm really enjoying playing with bright colours at the moment, I hope you are too! If you have a favourite image on this page or any feedback or questions please comment below, we love to hear from you!
Happy styling,
Sophie + co
All comments left before 9pm UK on Friday 18th May will be entered into a prize draw to win 3, A1 or 2, A0 custom backdrops of your choice with FREE UK delivery. This competition is open worldwide but shipping will be chargeable to winners outside the UK. See rates here. Good luck!

Shot with a custom colour backdrop. Direction + styling by Olson, photographer Bernacki.

73 comments
Thanks for your kind comments everyone! Really pleased you found the info interesting and/or helpful :) CRISTINA CAMACHO you have been selected at random as the giveaway winner! We will email you now re the £150 prize. Thanks again everyone xx
OMG that pink custom gradient with the grapefruits, beautiful! Gives a gorgeous contrast Love all your backdrops really. I am new in photography so those backdrops would be a great challenge to get out of the comfort zone !
Really love the Amsterdam background, so classic!
Love all these colors!!!
So many helpful tips, thank you! Want to try gradient backdrops for a long time.